PNG
Contents
[hide]Recommended export settings
This section is primarily for GIMP, but applies to all software.
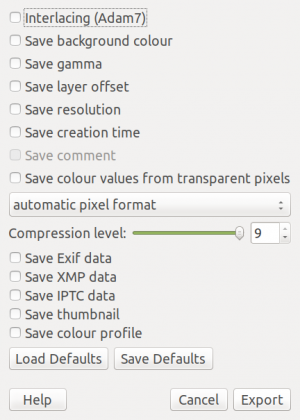
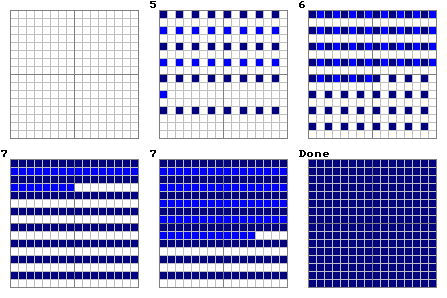
- Interlacing is usually best left off. While it can be helpful for giving viewers a low-resolution preview of the image as it downloads, this option increases the file size quite a bit.
- A background colour is generally not worth saving, but isn't necessarily bad if you think about it. Your toolbox's background colour will be displayed in viewers that do not support transparency (which is none of them at this point).
- Saving gamma may introduce gamma correction for some viewers and should typically be left off.
- Layer offset, resolution and creation time should all not be saved as in most cases all of this information is best discarded and will only waste storage.
- The option to save a comment will only be visible if you have set one in Image -> Image Properties -> Comment. This is plaintext that certain programs may display, but will normally not be visible. It might be a good idea to include a comment to catch out amateur thieves, but generally it isn't worthwhile.
- Colour values from transparent pixels are also best discarded. These only get displayed if the viewer doesn't support transparency.
- The pixel format should be left on the automatic setting. The only exception is if you wish to strip the alpha channel to save space, though if none of your layers have an alpha channel and are all at 100% opacity, an alpha channel won't be saved anyway.
- The compression level should always be left at the maximum. PNG is lossless, and this will not affect image quality - only file size. A lower compression level may result in faster exports (provided the disk drive is not a bottleneck), but a modern computer should be able to produce a single PNG at a sane resolution very quickly regardless of compression level.
- EXIF, XMP and IPTC data should not be saved, not only for saving space but also to avoid the possibility of accidentally uploading details to the internet that you didn't intend to! An example would be if you took a photo, edited it and uploaded it to the web. Details such as when you took it and what with could be included.
- Saving a thumbnail will allow certain software to display a thumbnail for the image without the need to generate one itself. This is generally best left off.
- Usually there is no need to include a colour profile with an image.
Indexed images
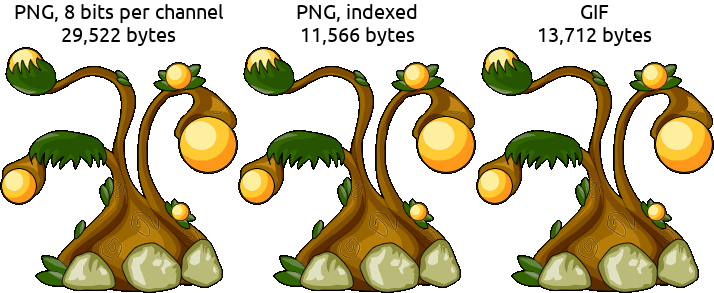
To save space, sometimes an indexed image can be used. This is known by some as PNG8. To use indexed colours in GIMP, load up an image and go to Image -> Mode -> Indexed... -> Convert. The default settings will do fine. This will allow us to create an image that has 256 colours, or 255 colours plus 1-bit transparency. By doing so, space can be saved for low-colour images. Sometimes it is claimed that GIF is superior for low-colour images, but this is rarely the case and is a thought pushed by the lack of knowledge that PNGs can be indexed.
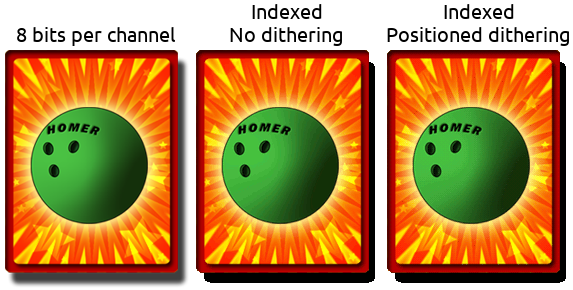
But we must be careful and only index images that have at most 255 or 256 colours! Notice what happens if we try indexing an image with more colours. Banding or dithering becomes visible on the ball as the colour cap has been reached and the gentle transparency has been lost (even if the image had fewer colours this would be lost since either a pixel is transparent or it isn't with indexed images). For our own uses, the trade-off between colour accuracy and file size may be good, but The Spriters Resource aims to archive sprites with zero quality loss.
The cons of indexed images
As with all things in life, there's no such thing as a free lunch. So what's the matter with indexed images?
- Indexed images will have to be converted back to RGB in order to get the best results out of procedures such as interpolated scaling. This might confuse someone who has not realised they have opened an indexed image.
Greyscale images
In rare cases, it may be beneficial to save a PNG in greyscale mode. To make an image greyscale in GIMP, go to Image -> Mode -> Greyscale. Assuming we are starting out with a greyscale image, the only time this mode makes sense to use is if we require a proper alpha channel (as opposed to 1-bit alpha), or if we require 256 shades of grey plus transparency. The rest of the time, an indexed image will result in smaller file sizes.
Animated PNGs
With Firefox and all Chromium-based browsers supporting animated PNGs, there isn't too much reason not to use them if you desire animation. Internet Explorer users will be displayed a static image - it won't completely break for them. Animated PNGs will often offer better file sizes or more colours than animated GIFs, though software that supports creating APNGs is still limited.
Limitations
PNGs can be no wider or taller than 2,147,483,647 pixels, resulting in a maximum resolution of 4.61EP. Due to current computer limitations, this is never an issue.


