Difference between revisions of "Cinema 4D"
m (category) |
(→OBJ) |
||
| Line 44: | Line 44: | ||
=== OBJ === | === OBJ === | ||
| − | Like with | + | Like with importing, Cinema 4D has poor support when it comes to exporting OBJ models. The created models will have all of their polygons and [[UV Map|UVs]] intact, but no MTL file will be created. This means that a MTL file will have to be created manually in order for the model to be acceptable as a submission. Alternatively, plugins are available for better OBJ exporting. |
=== DAE === | === DAE === | ||
Revision as of 12:10, 5 October 2017
Cinema 4D (aka C4D) is a professional 3D modeling and animation software developed by Maxon. It is capable of importing various, pre-existing 3D models, including game models.
Contents
Basics
One of the features that sets Cinema 4D apart from other 3D modeling programs is its easy-to-use interface. Camera controls are available in the top right corner of every model view port and can be used at any time, regardless of the currently selected tool. Most actions can be achieved through drag-and-drop or simply dragging. For example, materials can be applied to a mesh by dragging it from the Material list to the model. Textures can be imported into the scene by dragging them directly from the folder on your computer onto the model or Material.
For actions that use the mouse to control an object or input field (such as moving a model or using a value slider), the cursor's current position will not be changed while the action is being performed. This means that the mouse can be moved freely without you having to worry about hitting the edge of the screen. This can take some getting used to.
Cinema 4D's native file format is ".c4d" and is used for saving entire scenes for future use. This format is not acceptable for model submissions, as Cinema 4D is the only program that can open this type of file.
Interface
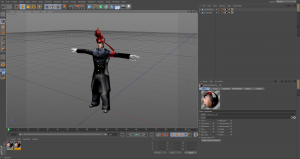
In the default layout, the section in the upper right-hand corner displays a list of the entire contents of the scene and is called the Objects panel. This is how you manage the models, lights, and cameras that make up the scene. The two small gray dots next to every object controls whether the model will appear in the editor (top dot) and in renders (bottom dot). Clicking them toggles between default, on, and off.
The panel in the bottom-right corner displays information about the current object or tool. This includes things like a model's coordinates, tool settings, and material properties.
The wide panel below the model view port is the material list. Clicking the material will bring up its information in the info panel. Double-clicking the material will bring up this same info in a new window. Materials can be assigned to models in the scene by dragging them from this panel to the mesh in the view port, or by dragging them to the mesh's name in the Objects panel.
The entire layout of Cinema 4D can be rearranged and customized, and these custom layouts can be saved for later use. Drop-down menus can be separated into small pop-up windows by clicking the dotted area of the menu. Layouts can be selected from menu in the top right (or button on the top left in older versions).
Importing Models
To a view a model file in Cinema 4D, simply use the standard file open dialog (ctrl+O/command-O) or drag the model into C4D's view port. Depending on your installation settings, you may also be able to open models files by double-clicking them. Models that are not in the native .c4d format are automatically imported into a new blank scene. An import setting dialog will appear before importing a model, with the settings available depending on the model's format.
Keep in mind that changing the imported model in Cinema 4D does not affect the original model.
OBJ and MTL
Unfortunately, Cinema 4D has poor support for the .obj model format. The actual meshes will load fine, but the textures will not. This is because Cinema 4D completely ignores .mtl files, which are necessary for .obj models to load textures and set up material colors. Because of this, all textures will have to be assigned to the model manually. Plugins and scripts exist for loading .mtl files and automatically assigning textures, though some of them do not work with the latest versions.
DAE
Cinema 4D has a very strict DAE importer. Models with a structure that violate the COLLADA DAE schema will usually fail to load, either partially or entirely, even if the model seems to load fine in other programs. Advanced users may be able to correct the flaws in the DAE structure to fix the model loading.
Problems caused by an improper DAE format include crashing Cinema 4D, loading with blank materials, loading with no model UVs, model skeletons using the wrong scale, and model pieces being misplaced. The latter two problems usually occur with models that were tampered with in 3DS Max and re-exported.
FBX
If there are any problems with the model's structure, it will crash Cinema 4D upon loading.
3DS
Materials that are supposed to have the Alpha channel enabled usually have the Transparency channel enabled instead. This most notably affects model exports from bmdview2.
VRML
Cinema 4D does not directly support vertex coloring, so it will not be able to load this information even though the format supports it. It will only load the material's standard color.
Exporting Models
Cinema 4D can export models in 15 different formats, including all of the acceptable formats. However, its exports are not always perfect. Additionally, shaders will not export on the model, so keep this in mind if you use shaders on your models for the sake of rendering.
OBJ
Like with importing, Cinema 4D has poor support when it comes to exporting OBJ models. The created models will have all of their polygons and UVs intact, but no MTL file will be created. This means that a MTL file will have to be created manually in order for the model to be acceptable as a submission. Alternatively, plugins are available for better OBJ exporting.
DAE
For whatever reason, DAE models created by Cinema 4D have an extra material defined. The material is empty and is not applied to anything. Additionally, the order of meshes in the scene is reversed. Any hierarchies remain the same.
It should be noted that Cinema 4D can export in two versions of the DAE format, 1.4 and 1.5. In general, these formats are practically identical, but some older programs (including older versions of Cinema 4D) may not support models using the 1.5 schema.
Guides
TODO
Texturing a Model
For models that do not import with textures already applied, they will have to be assigned manually. This section gives the basics of creating a material and applying it to a mesh.
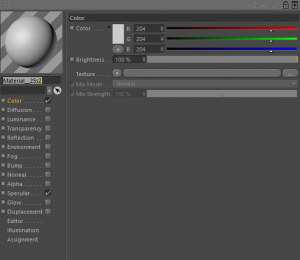
To upload the models, double click on a material, or right click and choose Edit to open the Material Editor box:
Highlight "Color" and click the Ellipses button to open your OS system's file window and locate the textures needed to replace the standard gray material.
You soon notice that the model is shining which, for most models, never shows up in the games they were ripped from. Even if the models come with the texture pre-installed, the shine is still present. This is because Cinema 4D automatically checks "Specular" when a new Material is created.
The problem is easily rectified by either double clicking a material and unchecking Specular, or highlighting all materials used in the model and unchecking Specular on the bottom right corner of the layout.
Be aware that, like any other program designed for 3D viewing or animation, what you download is what will be displayed onscreen. There is no known way of smoothing low-resolution polygons such as PSX, N64, or NDS models, and attempting to do so without properly understanding the mechanics of the software could ruin the original appearance of the models being viewed.
| Editing Software | |
|---|---|
| 2D | Adobe Photoshop - Aseprite - GraphicsGale - GIMP - Microsoft Paint - Paint.Net |
| 3D | Anim8or - Autodesk 3DS Max - Autodesk Maya - Blender - Cinema 4D - Milkshape 3D |
| Sounds | Adobe Audition - Audacity |


